Last week I made Megan Nielsen's
Gathered Dress and Top pattern to make a dress and a top. First off, the pattern is fabulous - it's affordable ($5), easy to understand, well-illustrated, and fits well. I managed to get a dress and top out of the yardage given, as my fabric was a bit wider. I sewed them side by side assembly-line style.
When I tried them both on, I realized I didn't want to layer under this for summer, so I decided to make a faux cami. (Excuse the odd self-pics and puffy tummy this baby's already pushing out)
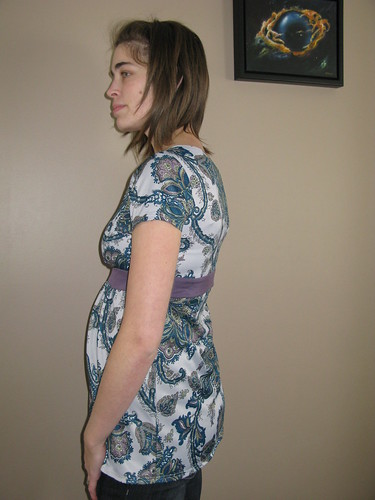
Dress with short sleeve option and contrasting ruffle and faux cami:

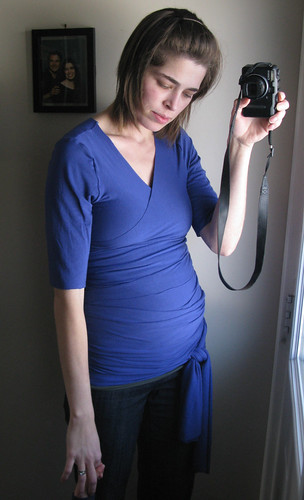
Top with kimono style sleeves (my alteration) and matching faux cami:

Basically I did half of a tube top attached to the side seams. I'm quite happy with it, as I can push the whole panel down to nurse after baby is born.
Here is my tutorial for a faux cami, in case you want to try this too!
Materials:small amount of knit fabric to match or coordinate with your outfit
1/4" wide clear elastic
This top has raglan style sleeves, so I sewed the faux cami inside to the side seam and a little ways up the raglan sleeve. You will have to adjust for the style of sleeve your outfit has.
1. Start with the top on, and measure under the bust from side seam to side seam. To this measurement add 1.5" for ease and seam allowance. Then measure up over the bust to where you want the cami to end. This was 5.5" for me, and then I added 0.5" for seam allowance.
2. Cut a rectangle of those dimensions with the maximum stretch going side to side. Here is where you'll need to adjust for different style sleeves. You'll cut a triangular or semi-circle shape out of the top two corners of your rectangle to match your sleeve seam. Slide the fabric under your top to see how it will fit. My "rectangle" ended up being 18" across the bottom, 6" top to bottom, and 15" across the top. The side edges were 4" tall, with a straight triangle cut from each corner to the top.
3. Now you'll be sewing elastic to each of the edges. I used clear swimsuit style elastic, as it's much less bulky than a regular elastic. Cut two lengths of elastic, one about 4" or 5" shorter than the bottom edge of your rectangle, and the other about 3" shorter than your top edge.

4. Serge or zigzag the shorter piece to the top of your rectangle on the wrong side. Then fold that edge down over the elastic to the inside and zigzag it down, making a casing for it.
5. Serge or zigzag the longer piece to the bottom edge on the right side (so that it won't irritate your skin. You won't be sewing a casing for this to avoid bulk).

6. Serge or finish the triangle top edges.
7. Now try the cami under your outfit and pin it in place in the side seams. You can make any adjustments now, making it tighter if needed.

8. Turn the outfit inside out and sew the cami to the side seams and up the sleeve seams. Turn it right side out and tack through the elastic edge of the bottom corners and the dress in the side seam.

That's it - you're finished! Hopefully that was clear. If you have any questions, please feel free to ask! Good luck!